Kit 37 Sensores Arduino
| Imagem | Produto | Preço | Comprar |
|---|---|---|---|
|
|
Kit 37 Sensores |
35.50€ |
|

O Kit de 37 Sensores para o Arduino e Raspberry é o mais recente kit de eletrónica da ElectroFun, constituído por 37 sensores essências para se iniciar no mundo da eletrónica!
Neste artigo abordaremos o funcionamento de todos os módulos que constituem este Kit para começar a desenvolver os seus projetos o mais rápido possível.
Módulo Joystick

O modulo joystick é um sensor analógico que pode ser usado para controlar arduino ou outros equipamentos como por exemplo servos.
O módulo joystick funciona com 2 potenciómetros, um potenciómetro horizontal e outro vertical, sendo o valor indicado pelo módulo o resultado proveniente de ambas as posições dos potenciómetros em simultâneo.
// Arduino pin numbers
const int SW_pin = 2; // digital pin connected to switch output
const int X_pin = 0; // analog pin connected to X output
const int Y_pin = 1; // analog pin connected to Y output

void setup(){
   pinMode(SW_pin, INPUT);
   digitalWrite(SW_pin, HIGH);
   Serial.begin(115200);
}

void loop(){
   Serial.print("Switch: ");
   Serial.print(digitalRead(SW_pin));
   Serial.print("\n");
   Serial.print("X-axis: ");
   Serial.print(analogRead(X_pin));
   Serial.print("\n");
   Serial.print("Y-axis: ");
   Serial.println(analogRead(Y_pin));
   Serial.print("\n\n");
   delay(500);
}
Sensor de Chama
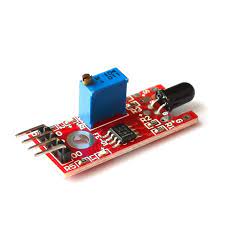
O sensor de chama é capaz de detetar fogo a curtas distâncias, este sensor funciona através da captação de ondas infravermelhas (IR) entre 700nm e 1000nm que corresponde ao intervalo de frequências produzidas pelas chamas.
// lowest and highest sensor readings:
const int sensorMin = 0; // sensor minimum
const int sensorMax = 1024; // sensor maximum

void setup() {
   // initialize serial communication @ 9600 baud:
   Serial.begin(9600);
}
void loop(){
   // read the sensor on analog A0:
   int sensorReading = analogRead(A0);
   // map the sensor range (four options):
   // ex: 'long int map(long int, long int, long int, long int, long int)'
   int range = map(sensorReading, sensorMin, sensorMax, 0, 3);

   // range value:
   switch (range) {
      case 0: // A fire closer than 1.5 feet away.
      Serial.println("** Close Fire **");
      break;

      case 1: // A fire between 1-3 feet away.
      Serial.println("** Distant Fire **");
      break;

      case 2: // No fire detected.
      Serial.println("No Fire");
      break;
   }
   delay(1); // delay between reads
}
Módulo Led RGB
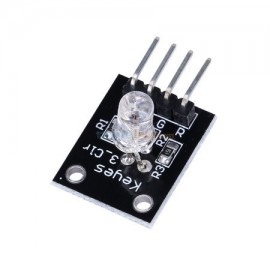
O módulo led RGB consiste na combinação de um Led Vermelho, Verde e Azul, a junção destes 3 leds origina um Led RGB, pode ligar várias cores ao mesmo tempo de forma a obter cores que de outra forma seriam impossíveis.
int redpin = 11; // select the pin for the red LED
int bluepin = 10; // select the pin for the blue LED
int greenpin = 9 ;// select the pin for the green LED
int val;

void setup (){
   pinMode (redpin, OUTPUT);
   pinMode (bluepin, OUTPUT);
   pinMode (greenpin, OUTPUT);
   Serial.begin (9600);
}

void loop (){
   for (val = 255; val> 0; val --) {
      analogWrite (11, val);
      analogWrite (10, 255-val);
      analogWrite (9, 128-val);
      delay (10);
      Serial.println (val, DEC);
   }

   for (val = 0; val <255; val ++){
      analogWrite (11, val);
      analogWrite (10, 255-val);
      analogWrite (9, 128-val);
      delay (10);
      Serial.println (val, DEC);
   }
}
Módulo Detector de Frequência Cardíaca

O módulo detector de frequência cardíaca funciona através de um Led e LDR para ser possível medir a passagem de luz pelo corpo, sendo que o sangue se move a cada pulsação é possível inferir a detecção e não detecção de luz como sendo uma batida.
// Pulse Monitor Test Script
int sensorPin = 0;
double alpha = 0.75;
int period = 100;
double change = 0.0;
double minval = 0.0;

void setup (){
   Serial.begin (9600);
}

void loop (){
   static double oldValue = 0;
   static double oldChange = 0;

   int rawValue = analogRead (sensorPin);
   double value = alpha * oldValue + (1 - alpha) * rawValue;

   Serial.print (rawValue);
   Serial.print (",");
   Serial.println (value);
   oldValue = value;

   delay (period);
}
Módulo Magic Light Cup

O módulo Magic Light Cup é funciona de forma semelhante a um Tilt Sensor através de mercúrio encapsulado que funciona como interruptor.
int LedPinA = 5;
int LedPinB = 6;
int ButtonPinA = 7;
int ButtonPinB = 4;
int buttonStateA = 0;
int buttonStateB = 0;
int brightness = 0;

void setup (){
   pinMode (LedPinA, OUTPUT);
   pinMode (LedPinB, OUTPUT);
   pinMode (ButtonPinA, INPUT);
   pinMode (ButtonPinB, INPUT);
}

void loop (){
   buttonStateA = digitalRead (ButtonPinA);
   if (buttonStateA == HIGH && brightness! = 255){
      brightness + +;
   }

   buttonStateB = digitalRead (ButtonPinB);

   if (buttonStateB == HIGH && brightness! = 0){
      brightness --;
   }

   analogWrite (LedPinA, brightness); // A few Guan Yuan (ii) ?
   analogWrite (LedPinB, 255 - brightness);// B Yuan (ii) a few Bang ?
   delay (25);
}
Módulo Efeito Hall
O módulo efeito hall é usado para detectar a presença de campos magnéticos, caso exista magnetismo na zona o sinal lido é HIGH caso contrário, LOW.
int Led = 13 ; // define LED Interface
int SENSOR = 10 ; // define the Hall magnetic sensor interface
int val ; // define numeric variables val

void setup (){
   pinMode (Led, OUTPUT) ; // define LED as output interface
   pinMode (SENSOR, INPUT) ; // define the Hall magnetic sensor line as input
}

void loop (){
   val = digitalRead (SENSOR) ; // read sensor line
   if (val == LOW){
      digitalWrite (Led, HIGH);
   } else {
      digitalWrite (Led, LOW);
   }
}
Módulo Relé

Com o módulo relé pode controlar equipamentos até 220v com um sinal de apenas 5v. O relé funciona como um interruptor que abre ou fecha o circuito através de um sinal externo.
int relay = 10; // relay turns trigger signal - active high;

void setup (){
   pinMode (relay, OUTPUT); // Define port attribute is output;
}

void loop (){
   digitalWrite (relay, HIGH); // relay conduction;
   delay (1000);
   digitalWrite (relay, LOW); // relay switch is turned off;
   delay (1000);
}
Sensor Hall de Campo

O sensor hall de campo é um sensor analógico que permite quantificar a força de um campo magnético.
int Led = 13 ; // define LED Interface
int buttonpin = 3; // define the linear Hall magnetic sensor interface
int val ; // define numeric variables val

void setup (){
   pinMode (Led, OUTPUT) ; // define LED as output interface
   pinMode (buttonpin, INPUT) ; // define linear Hall magnetic sensor output interface
}

void loop (){
   val = digitalRead (buttonpin) ; // digital interface will be assigned a value of 3 to read val
   if (val == HIGH){
      digitalWrite (Led, HIGH);
   } else {
      digitalWrite (Led, LOW);
   }
}
Módulo Led SMD RGB
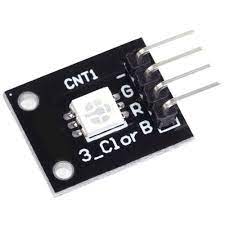
O módulo led SMD RGB possui um funcionamento semelhante a ao módulo anterior mas em formato SMD (Surface Mount Device).
int redpin = 11; // select the pin for the red LED
int bluepin = 10; // select the pin for the blue LED
int greenpin = 9 ;// select the pin for the green LED

int val;

void setup () {
   pinMode (redpin, OUTPUT);
   pinMode (bluepin, OUTPUT);
   pinMode (greenpin, OUTPUT);
   Serial.begin (9600);
}

void loop () {
   for (val = 255; val> 0; val --) {
      analogWrite (11, val);
      analogWrite (10, 255-val);
      analogWrite (9, 128-val);
      delay (10);
      Serial.println (val, DEC);
   }

   for (val = 0; val <255; val ++) {
      analogWrite (11, val);
      analogWrite (10, 255-val);
      analogWrite (9, 128-val);
      delay (10);
      Serial.println (val, DEC);
   }
}
Módulo Detector de Som

O módulo detector de som têm como finalidade detectar sons. Os sons detectados podem ser interpretados de forma digital e/ou analógica.
Detector de Som Digital:
int Led = 13 ;// define LED Interface
int buttonpin = 3; // define D0 Sensor Interface
int val = 0;// define numeric variables val

void setup () {
   pinMode (Led, OUTPUT) ;// define LED as output interface
   pinMode (buttonpin, INPUT) ;// output interface D0 is defined sensor
}

void loop () {
   val = digitalRead(buttonpin);// digital interface will be assigned a value of pin 3 to read val

   if (val == HIGH){
      digitalWrite (Led, HIGH);
   } else {
      digitalWrite (Led, LOW);
   }
}
Detector de Som Analógico:
int sensorPin = A0; // select the input pin for the potentiometer
int ledPin = 13; // select the pin for the LED
int sensorValue = 0; // variable to store the value coming from the sensor

void setup () {
   pinMode (ledPin, OUTPUT);
   Serial.begin (9600);
}

void loop () {
   sensorValue = analogRead (sensorPin);
   digitalWrite (ledPin, HIGH);
   delay (sensorValue);
   digitalWrite (ledPin, LOW);
   delay (sensorValue);
   Serial.println (sensorValue, DEC);
}
Sensor de Toque

O sensor de toque é capaz de detectar toques, geralmente usado como switch.
int Led = 13 ; // define LED Interface
int buttonpin = 3; // define Metal Touch Sensor Interface
int val ; // define numeric variables val

void setup (){
   pinMode (Led, OUTPUT) ; // define LED as output interface
   pinMode (buttonpin, INPUT) ; // define metal touch sensor output interface
}

void loop () {
   val = digitalRead (buttonpin) ; // digital interface will be assigned a value of 3 to read val
   if (val == HIGH) // When the metal touch sensor detects a signal, LED flashes {
      digitalWrite (Led, HIGH);
   } else {
      digitalWrite (Led, LOW);
   }
}
Módulo Led Flasher 7 Cores

O módulo led flasher 7 cores é constituído por um led de 7 cores que pisca automaticamente com uma animação predefinida – Reiniciar o modulo reinicia também a animação.
void setup () {
   pinMode (13, OUTPUT);
}

void loop () {
   digitalWrite (13, HIGH); // set the LED on
   delay (2000); // wait for a second
   digitalWrite (13, LOW); // set the LED off
   delay (2000); // wait for a second
}
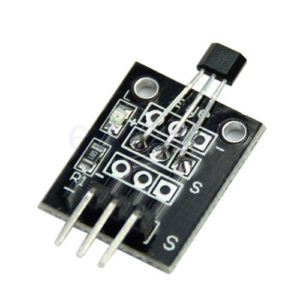
Sensor de Temperatura 18B20
O sensor de temperatura 18B20 é um sensor de temperatura de alta precisão, ideal para aplicações que exijam medições congruentes.
#include <OneWire.h>

OneWire ds(10); // on pin 10

void setup(void) {
   Serial.begin(9600);
}

void loop(void) {
   int HighByte, LowByte, TReading, SignBit, Tc_100, Whole, Fract;

   byte i;
   byte present = 0;
   byte data[12];
   byte addr[8];

   if ( !ds.search(addr)) {
      Serial.print("No more addresses.\n");
      ds.reset_search();
      return;
   }

   Serial.print("R=");

   for( i = 0; i < 8; i++) {
      Serial.print(addr[i], HEX);
      Serial.print(" ");
   }

   if ( OneWire::crc8( addr, 7) != addr[7]) {
      Serial.print("CRC is not valid!\n");
      return;
   }

   if ( addr[0] == 0x10) {
      Serial.print("Device is a DS18S20 family device.\n");
   } else if ( addr[0] == 0x28) {
      Serial.print("Device is a DS18B20 family device.\n");
   } else {
      Serial.print("Device family is not recognized: 0x");
      Serial.println(addr[0],HEX);
      return;
   }

   ds.reset();
   ds.select(addr);
   ds.write(0x44,1); // start conversion, with parasite power on at the end

   delay(1000); // maybe 750ms is enough, maybe not
   present = ds.reset();
   ds.select(addr);
   ds.write(0xBE); // Read Scratchpad

   Serial.print("P=");
   Serial.print(present,HEX);
   Serial.print(" ");

   for ( i = 0; i < 9; i++) { // we need 9 bytes
      data[i] = ds.read();
      Serial.print(data[i], HEX);
      Serial.print(" ");
   }

   Serial.print(" CRC=");
   Serial.print( OneWire::crc8( data, 8), HEX);
   Serial.println();

   LowByte = data[0];
   HighByte = data[1];
   TReading = (HighByte << 8) + LowByte;
   SignBit = TReading & 0x8000; // test most sig bit

   if (SignBit){
      TReading = (TReading ^ 0xffff) + 1; // 2's comp
   }

   Tc_100 = (6 * TReading) + TReading / 4; // multiply by (100 * 0.0625) or 6.25
   Whole = Tc_100 / 100; // separate off the whole and fractional portions
   Fract = Tc_100 % 100;


   if (SignBit) {
      Serial.print("-");
   }

   Serial.print(Whole);
   Serial.print(".");

   if (Fract < 10) {
      Serial.print("0");
   }

   Serial.print(Fract);
   Serial.print("\n");
}
Módulo Led 2 Cores

O módulo led 2 cores é constituído por um led verde e vermelha que podem ser ligadas individualmente ou em simultâneo para obter uma cor amarela/laranja.
int redpin = 11; // select the pin for the red LED
int greenpin = 10; // select the pin for the green LED
int val;

void setup () {
   pinMode (redpin, OUTPUT);
   pinMode (greenpin, OUTPUT);
}

void loop () {
   for (val = 255; val> 0; val--){
      analogWrite (greenpin, val);
      analogWrite (redpin, 255-val);
      delay (15);
   }
   for (val = 0; val <255; val++){
      analogWrite (greenpin, val);
      analogWrite (redpin, 255-val);
      delay (15);
   }
}
Módulo Laser

O módulo laser é um díodo laser que possui um pino digital que permite efectuar o controlo do módulo.
void setup (){
   pinMode (13, OUTPUT); // define the digital output interface 13 feet
}

void loop () {
   digitalWrite (13, HIGH); // open the laser head
   delay (1000); // delay one second
   digitalWrite (13, LOW); // turn off the laser head
   delay (1000); // delay one second
}
Módulo Detector de Inclinação
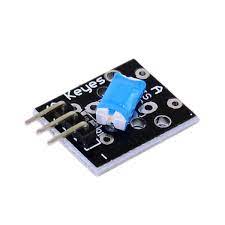
O módulo detector de inclinação é capaz de detectar inclinação através de uma bola de metal que constitui o interior do módulo. Dependendo da posição da bola o circuito é aberto ou fechado.
int Led = 13 ;// define LED Interface
int buttonpin = 3; // define the tilt switch sensor interfaces
int val ;// define numeric variables val


void setup () {
   pinMode (Led, OUTPUT) ;// define LED as output interface
   pinMode (buttonpin, INPUT) ;//define the output interface tilt switch sensor
}

void loop () {
   val = digitalRead (buttonpin) ;// digital interface will be assigned a value of 3 to read val
   if (val == HIGH) {
      digitalWrite (Led, HIGH);
   } else {
      digitalWrite (Led, LOW);
   }
}
Módulo Buzzer Passivo e Ativo


Buzzer Ativo – É usado como sinal sonoro, pode também ser usado para programar músicas.
Buzzer Passivo – Semelhante ao buzzer ativo têm como diferença ser possível controlar as frequências emitidas.
int speakerPin = 8;

void setup () {
   pinMode (speakerPin, OUTPUT);
}

void loop () {
   analogWrite (speakerPin, 255);
   delay(50);
   analogWrite (speakerPin, 0);
   delay(10);
}
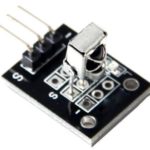
Módulo Emissor IR

O módulo emissor IR é capaz de emitir ondas infravermelhas numa dada frequência, sendo possível replicar ondas IR dos comandos das suas televisões para as controlar com o seu arduino.
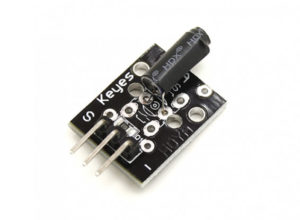
Módulo Recetor IR
O módulo recetor IR é capaz de interceptar e interpretar ondas infravermelhas num ambiente, com este módulo pode controlar o seu arduino com os comandos de sua casa.
#include <IRremote.h>

int RECV_PIN = 11;

IRrecv irrecv(RECV_PIN);

decode_results results;

void setup() {
   Serial.begin(9600);
   irrecv.enableIRIn(); // Start the receiver
}

void loop() {
   if (irrecv.decode(&results)) {
      Serial.println(results.value, HEX);
      irrecv.resume(); // Receive the next value
   }
}
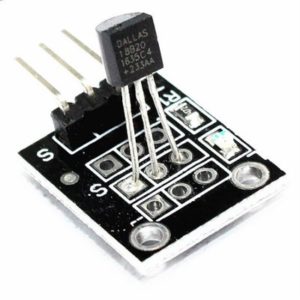
Sensor de Temperatura Digital

O sensor de temperatura digital é capaz de medir a temperatura ambiente no formato digital.
#include <OneWire.h>

OneWire ds(10); // on pin 10

void setup(void) {
   Serial.begin(9600);
}

void loop(void) {
   byte i;
   byte present = 0;
   byte data[12];
   byte addr[8];

   ds.reset_search();
   if ( !ds.search(addr)) {
      Serial.print("No more addresses.\n");
      ds.reset_search();
      return;
   }

   Serial.print("R=");
   for( i = 0; i < 8; i++) {
      Serial.print(addr[i], HEX);
      Serial.print(" ");
   }

   if ( OneWire::crc8( addr, 7) != addr[7]) {
      Serial.print("CRC is not valid!\n");
      return;
   }

   if ( addr[0] == 0x10) {
      Serial.print("Device is a DS18S20 family device.\n");
   } else if ( addr[0] == 0x28) {
      Serial.print("Device is a DS18B20 family device.\n");
   } else {
      Serial.print("Device family is not recognized: 0x");
      Serial.println(addr[0],HEX);
      return;
   }

   ds.reset();
   ds.select(addr);
   ds.write(0x44,1); // start conversion, with parasite power on at the end

   delay(1000);

   present = ds.reset();
   ds.select(addr);
   ds.write(0xBE); // Read Scratchpad

   Serial.print("P=");
   Serial.print(present,HEX);
   Serial.print(" ");

   for ( i = 0; i < 9; i++) { // we need 9 bytes
      data[i] = ds.read();
      Serial.print(data[i], HEX);
      Serial.print(" ");
   }

   Serial.print(" CRC=");
   Serial.print( OneWire::crc8( data, 8), HEX);
   Serial.println();
}
Módulo Botão
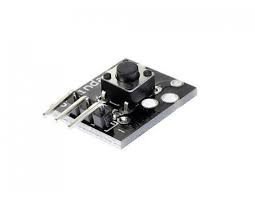
O módulo botão é um botão de pressão capaz de ser usado como toggle ou press and hold.
const int buttonPin = 2; // the number of the pushbutton pin
const int ledPin = 13; // the number of the LED pin

int buttonState = 0;

void setup() {
   pinMode(ledPin, OUTPUT);
   pinMode(buttonPin, INPUT);
}

void loop() {
   buttonState = digitalRead(buttonPin);

   if (buttonState == HIGH) {
      digitalWrite(ledPin, HIGH);
   } else {
      digitalWrite(ledPin, LOW);
   }
}
Sensor de Vibração
O sensor de vibração é capaz de medir vibrações e choques.
int Led = 13 ;// define LED Interface
int Shock = 10; // define the vibration sensor interface
int val; // define numeric variables val

void setup () {
   pinMode (Led, OUTPUT) ; // define LED as output interface
   pinMode (Shock, INPUT) ; // output interface defines vibration sensor
}

void loop () {
   val = digitalRead (Shock) ; // read digital interface is assigned a value of 3 val
   if (val == HIGH) {
      digitalWrite (Led, LOW);
   } else {
      digitalWrite (Led, HIGH);
   }
}
Módulo Detetor de Obstáculos
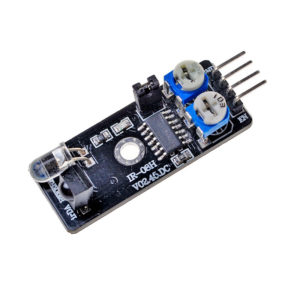
O módulo detetor de obstáculos utiliza um emissor e receptor IR de forma a detectar a presença de obstáculos na sua trajectória – Frequentemente usado em projetos de robótica.
int Led = 13 ;// define LED Interface
int buttonpin = 3; // define the obstacle avoidance sensor interface
int val ;// define numeric variables val

void setup () {
   pinMode (Led, OUTPUT) ;// define LED as output interface
   pinMode (buttonpin, INPUT) ;// define the obstacle avoidance sensor output interface
}

void loop () {
   val = digitalRead (buttonpin) ;// digital interface will be assigned a value of 3 to read val
   if (val == HIGH){
      digitalWrite (Led, HIGH);
   } else {
      digitalWrite (Led, LOW);
   }
}
Sensor de Batida

O sensor de batida é capaz de ler batidas e toques, este sensor envia data momentaneamente para o arduino correspondente a duração da batida. Contudo o código pode ser adaptado par que funcione como o interruptor (toggle).
const int buttonPin = 3; // the pin that the pushbutton is attached to
const int ledPin = 13; // the pin that the LED is attached to

int buttonPushCounter = 0; // counter for the number of button presses
int buttonState = 0; // current state of the button
int lastButtonState = 0; // previous state of the button

void setup() {
   pinMode(buttonPin, INPUT);
   pinMode(ledPin, OUTPUT);
   Serial.begin(9600);
}


void loop() {
   buttonState = digitalRead(buttonPin);
   if (buttonState != lastButtonState) {
      if (buttonState == HIGH) {
         buttonPushCounter++;
         Serial.println("on");
         Serial.print("number of button pushes: ");
         Serial.println(buttonPushCounter);
      } else {
         Serial.println("off");
      }
   }

   lastButtonState = buttonState;
   if (buttonPushCounter % 4 == 0) {
      digitalWrite(ledPin, HIGH);
   } else {
      digitalWrite(ledPin, LOW);
   }
}
Sensor Bloqueio de Luz

O sensor de bloqueio de luz, detecta a passagem de luz no meio da sua curvatura, caso exista passagem de luz o sensor indicará HIGH, ou LOW se não houver passagem de luz.
const int buttonPin = 2; // the number of the pushbutton pin
const int ledPin = 13; // the number of the LED pin

int buttonState = 0;

void setup() {
   pinMode(ledPin, OUTPUT);
   pinMode(buttonPin, INPUT);
}

void loop(){
   buttonState = digitalRead(buttonPin);

   if (buttonState == HIGH) {
      digitalWrite(ledPin, HIGH);
   } else {
      digitalWrite(ledPin, LOW);
   }
}
Módulo Encoder Rotativo

O módulo encoder rotativo, é semelhante a um potenciómetro têm como diferença não ser fisicamente limitado, isto é, pode rodar continuamente e sempre que reiniciar o seu arduino o valor do encoder retoma ao 0.
int redPin = 2;
int yellowPin = 3;
int greenPin = 4;
int aPin = 6;
int bPin = 7;
int buttonPin = 5;
int state = 0;
int longPeriod = 5000; // Time at green or red
int shortPeriod = 700; // Time period when changing
int targetCount = shortPeriod;
int count = 0;
void setup ()
{
pinMode (aPin, INPUT);
pinMode (bPin, INPUT);
pinMode (buttonPin, INPUT);
pinMode (redPin, OUTPUT);
pinMode (yellowPin, OUTPUT);
pinMode (greenPin, OUTPUT);
}

void loop () {
   count++;

   if (digitalRead (buttonPin)) {
      setLights (HIGH, HIGH, HIGH);
   } else {
      int change = getEncoderTurn ();
      int newPeriod = longPeriod + (change * 1000);

      if (newPeriod >= 1000 && newPeriod <= 10000) {
         longPeriod = newPeriod;
      }

      if (count> targetCount) {
         setState ();
         count = 0;
      }
   }
}

int getEncoderTurn () {
   static int oldA = LOW;
   static int oldB = LOW;
   int result = 0;
   int newA = digitalRead (aPin);
   int newB = digitalRead (bPin);

   if (newA != oldA || newB != oldB) {
      if (oldA == LOW && newA == HIGH) {
         result = - (oldB * 2 - 1);
      }
   }

   oldA = newA;
   oldB = newB;
   return result;
}

int setState () {
   if (state == 0) {
      setLights (HIGH, LOW, LOW);
      targetCount = longPeriod;
      state = 1;
   } else if (state == 1) {
      setLights (HIGH, HIGH, LOW);
      targetCount = shortPeriod;
      state = 2;
   } else if (state == 2) {
      setLights (LOW, LOW, HIGH);
      targetCount = longPeriod;
      state = 3;
   } else if (state == 3) {
      setLights (LOW, HIGH, LOW);
      targetCount = shortPeriod;
      state = 0;
   }
}

void setLights (int red, int yellow, int green) {
   digitalWrite (redPin, red);
   digitalWrite (yellowPin, yellow);
   digitalWrite (greenPin, green);
}
Módulo Interruptor Magnético e Mini Módulo Interruptor Magnético


Ambos os módulos possuem funcionamento idêntico, a presença de campo magnético faz com que o interruptor ligue.
A diferença entre os módulos esta no tamanho e na quantidade de força magnética é necessária para abrir ou fechar o circuito.
int Led = 13 ;// define LED Interface
int buttonpin = 3; // define the Reed sensor interfaces
int val ;// define numeric variables val

void setup () {
   pinMode (Led, OUTPUT) ;// define LED as output interface
   pinMode (buttonpin, INPUT) ;// output interface as defined Reed sensor
}

void loop () {
   val = digitalRead (buttonpin) ;// digital interface will be assigned a value of 3 to read val
   if (val == HIGH) {
      digitalWrite (Led, HIGH);
   } else {
      digitalWrite (Led, LOW);
   }
}
Em ElectroFun.pt encontra esta e muitos mais Sensores ao seu dispor, com prazo de entrega entre 1 a 2 dias. A ElectroFun é uma Loja de Eletrónica, com loja física em Portugal, localizada em Vila Nova de Gaia (Porto).